The appearance of cracks on interior walls can be disconcerting, diminishing the aesthetic appeal of an otherwise pristine space. While some cracks signal deeper structural issues requiring professional intervention, the vast majority are superficial — hairline fractures, spiderweb patterns, or minor settlement cracks that are entirely within the realm of a confident DIY enthusiast to tackle. This article serves as your comprehensive guide to repairing small wall cracks, equipping you with the techniques and material knowledge to achieve a seamless, professional-grade finish.
Understanding Wall Cracks: When to DIY, When to Call a Pro
Before grabbing your tools, it’s crucial to correctly identify the type of crack you’re dealing with. Not all cracks are created equal, and attempting to repair a symptom of a larger problem can be a futile exercise.
Types of Small, DIY-Friendly Cracks:
- Hairline Cracks: Very thin, often barely visible, typically caused by paint aging, minor house settlement, or drywall seams.
- Spiderweb Cracks: Numerous fine lines radiating from a central point, usually in plaster or old paint layers, often due to movement or drying.
- Settlement Cracks (Minor): Small, vertical or horizontal cracks often appearing near doors and windows, common in newer homes as they settle or older homes due to minor expansion/contraction.
- Taped Joint Cracks: Cracks appearing directly along drywall seams, indicating a failure of the joint compound or tape.
When to Call a Professional (Avoid DIY):
- Large, Wide Cracks: Cracks wider than 1/8 inch (3mm) or those that are actively widening.
- Cracks with Bulging or Displaced Material: This often indicates significant structural movement.
- Cracks Running Diagonally Across a Wall, Especially Near Corners: Particularly if they continue through multiple rooms or levels.
- Cracks Accompanied by Sagging Floors, Sticking Doors/Windows, or Leaks: These are strong indicators of foundation issues or serious structural damage.
- Cracks that Reappear Rapidly After Repair: Suggests ongoing movement that superficial repair won’t solve.
Difficulty Assessment: Can You Really Repair It “Like a Pro”?
Repairing small wall cracks is not inherently difficult in terms of the steps involved. The challenge, and where the “pro” aspect truly comes into play, lies in achieving a seamless, undetectable finish. This requires:
- Patience: Rushing layers or sanding will yield poor results.
- Attention to Detail: Meticulous cleaning, precise application, and thorough feathering.
- Practice: Your first repair might not be perfect, but each subsequent one will improve.
With the right materials and a methodical approach, you absolutely can achieve professional-quality repairs.
Materials and Tools You’ll Need
Having the correct supplies is half the battle. Invest in quality materials; they make a significant difference in the final outcome.
| Category | Item | Description |
|---|---|---|
| Safety | Safety Glasses, Dust Mask/Respirator | Protect your eyes and lungs from dust and airborne particles, especially during sanding. |
| Gloves | Keep your hands clean and protected from compounds. | |
| Preparation | Utility Knife/5-in-1 Tool | For widening cracks, scraping loose paint/plaster. |
| Stiff Brush / Shop Vacuum | For cleaning dust and debris from the crack and surrounding area. | |
| Mild Detergent & Sponge/Cloth | For cleaning the wall surface. | |
| Repair | Drywall Repair Compound / Spackle | For hairline cracks: lightweight spackle. For wider cracks (up to 1/8″): vinyl spackle or patching plaster. |
| All-Purpose Joint Compound | For skim coating and achieving a smooth finish. Can also be used for wider cracks with tape. Choose “lightweight” for easier sanding. | |
| Drywall Tape (Fiberglass Mesh or Paper) | Essential for cracks wider than a hairline (1/16″ or more) or those at drywall seams. Fiberglass mesh is self-adhesive and easier for DIYers. | |
| Putty Knives / Drywall Trowels | 2-inch, 4-inch, and 6-inch sizes are ideal for applying compound and feathering edges. A wider knife (10-12 inch) is excellent for finishing. | |
| Mud Pan or Hawk | For holding and mixing compound. | |
| Finishing | Sanding Block / Pole Sander | For even pressure during sanding. A pole sander is useful for larger areas or high spots. |
| Sandpaper (120-grit, 220-grit) | Start with 120-grit for initial shaping, finish with 220-grit for a super smooth finish. | |
| Tack Cloth / Damp Sponge | For removing sanding dust before priming/painting. | |
| Paint | Primer | Crucial for sealing the repair, preventing flash spots, and ensuring paint adhesion. A stain-blocking primer is best. |
| Wall Paint | Matching the existing wall color and finish. |
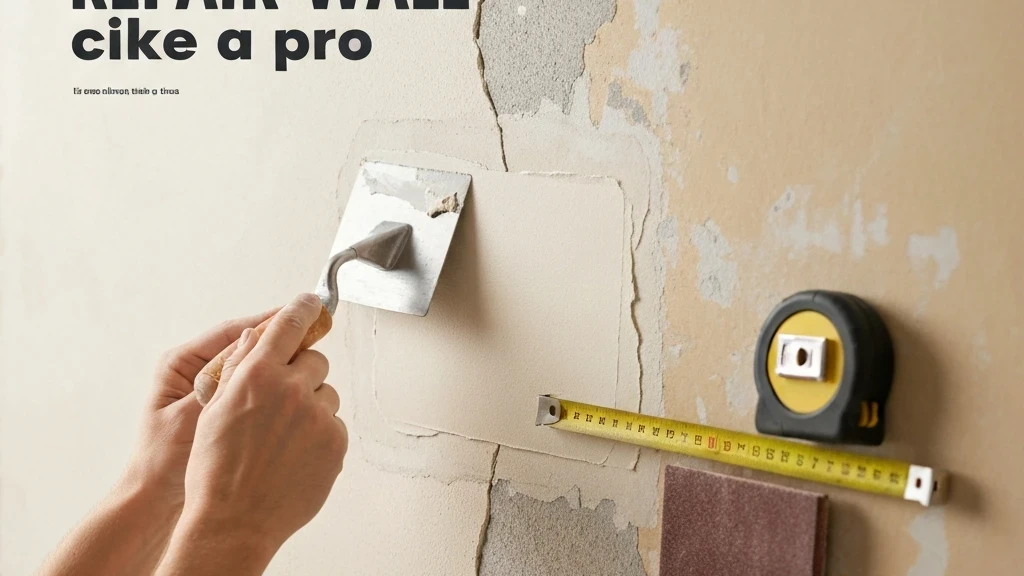
The Professional Approach: Step-by-Step Wall Crack Repair
Achieving a professional repair is about meticulous execution of each step. Take your time, and don’t skip any stages.
Step 1: Assess and Prepare the Area
- Clean the Wall: Using a mild detergent and sponge, thoroughly clean the area around the crack. Remove any dirt, grease, or loose paint. Rinse with clean water and allow to dry completely.
- Examine and Widen the Crack (If Necessary):
- For hairline cracks, no widening is usually needed.
- For wider cracks (1/16″ to 1/8″) or those in old plaster, use a utility knife or the corner of a 5-in-1 tool to gently V-cut along the crack. This creates a bevel that allows the filler to penetrate deeper and adhere better, reducing the chance of the crack reappearing. Do not make it too wide or deep.
- Scrape away any loose paint, plaster, or drywall material around the crack.
- Remove Dust: Use a stiff brush or a shop vacuum to remove all dust and debris from the crack and the prepared area. A clean surface is vital for proper adhesion.
Step 2: Apply Crack Filler/Patch (First Layer)
This step depends on the size and nature of the crack.
- For Hairline Cracks (less than 1/16″):
- Load a small amount of lightweight spackle onto a 2-inch or 4-inch putty knife.
- Holding the knife at a 45-degree angle, press the spackle firmly into the crack, ensuring it penetrates fully.
- Immediately scrape away excess compound, leaving only a thin layer filling the crack and slightly feathered onto the wall.
- Allow to dry completely (check product instructions; usually 1-2 hours).
- For Wider Cracks (1/16″ to 1/8″) or Drywall Joint Cracks:
- Apply Drywall Tape: This is critical for reinforcing the repair and preventing the crack from reappearing.
- If using self-adhesive fiberglass mesh tape, center it over the crack and press firmly.
- If using paper tape, apply a thin, even layer of all-purpose joint compound over the crack first. Then, lay the paper tape over the wet compound and press it firmly into the compound with a 4-inch putty knife, squeezing out any excess compound or air bubbles. Ensure it lies perfectly flat.
- Apply First Coat of Joint Compound: Load joint compound onto your putty knife (4-inch or 6-inch). Apply a thin, even layer over the tape, extending about 2-3 inches beyond the edges of the tape. Feather the edges so they blend smoothly into the existing wall surface.
- Allow to dry completely (4-24 hours, depending on thickness and humidity). It’s better to let it dry longer than to rush.
- Apply Drywall Tape: This is critical for reinforcing the repair and preventing the crack from reappearing.
Step 3: Skim Coat with Joint Compound (Subsequent Layers)
This is where you build up and smooth the repair.
- Inspect and Lightly Sand (Optional): Once the first layer is completely dry, lightly run your hand over it. If there are any significant ridges or bumps, very lightly sand with 120-grit sandpaper to knock them down. Do not sand through the tape. Wipe away dust with a tack cloth.
- Apply Second Coat: Using a wider putty knife (6-inch or 10-inch), apply a second, very thin layer of all-purpose joint compound over the previous layer. Extend this coat slightly wider than the first, feathering the edges even further into the wall. The goal is to gradually blend the repair into the wall texture.
- Allow to Dry: Again, allow ample drying time.
- Repeat (if necessary): For deeper repairs or if you didn’t achieve a perfectly smooth finish with two coats, apply a third, even thinner layer, extending it even wider to ensure a truly seamless transition. Think multiple thin coats rather than one thick coat. This is a pro technique.
Step 4: Sanding for a Seamless Finish
This is the most critical step for achieving a “like a pro” finish.
- Ensure Complete Dryness: The compound must be bone dry before sanding. It will be lighter in color when dry.
- Initial Sanding (120-grit): Using a sanding block or pole sander, gently sand the entire patched area. Use light, circular motions. The goal is to smooth out any ridges, tool marks, and to feather the edges perfectly into the surrounding wall. Do not over-sand, especially over the tape.
- Fine Sanding (220-grit): Switch to finer 220-grit sandpaper. This will remove any remaining imperfections and create a silky-smooth surface that will disappear under paint. Run your hand over the repair frequently; your fingertips are excellent detectors of imperfections. Feel for it, don’t just look for it.
- Dust Removal: Thoroughly wipe down the entire area with a tack cloth or a slightly damp sponge to remove all sanding dust. This is essential for proper primer and paint adhesion.
Step 5: Prime and Paint
This final step seals the repair and ensures an invisible finish.
- Apply Primer: Use a good quality interior primer, preferably a stain-blocking primer. Apply one or two thin, even coats over the entire repaired area, extending slightly beyond the patch onto the existing wall. Primer helps seal the porous joint compound, preventing “flashing” (where the repaired area looks duller or different in sheen than the rest of the wall after painting).
- Allow Primer to Dry: Follow the manufacturer’s drying time instructions.
- Paint: Once the primer is dry, apply your matching wall paint. You will likely need two coats to ensure full coverage and a uniform finish. When painting, try to feather the edges of the paint into the existing wall to minimize paint lines, especially if you’re not repainting the entire wall.
Advanced Tips for a Flawless Finish
- Feathering is Key: Always extend each layer of compound and paint slightly wider than the last, tapering the edges down to nothing. This gradual transition makes the repair virtually invisible.
- Use Good Lighting: When sanding, use a bright work light held at an angle to the wall. This will highlight any imperfections, ridges, or bumps that you might miss under normal lighting.
- Clean Your Tools: Always clean your putty knives and mud pan thoroughly immediately after use. Dried compound is a nightmare to remove and will leave lumps in your next batch.
- Work in Thin Layers: This cannot be stressed enough. Thin layers dry faster, are easier to sand, and result in a much smoother finish than one thick application.
- Patience is Your Best Tool: Rushing any step will compromise the final result. Allow adequate drying time, and take breaks if you get frustrated.
Troubleshooting Common Issues
- Cracks Reappearing: This usually indicates either inadequate preparation (e.g., not using tape on wider cracks) or an underlying structural issue that needs professional assessment.
- Uneven Texture/Bumps: Insufficient sanding, too much compound applied in one layer, or not feathering the edges adequately. Go back, lightly sand, apply a very thin skim coat, and re-sand.
- Paint Flashing/Different Sheen: This is almost always due to skipping the primer step. Primer seals the porosity of the compound, creating a uniform surface for the topcoat.
Conclusion
Repairing small wall cracks is a highly satisfying DIY project that significantly impacts the appearance of your home. By understanding the types of cracks, selecting the right materials, and meticulously following these expert-level steps, you can achieve a seamless finish that rivals professional work. Remember, patience, attention to detail, and proper feathering are your allies in transforming those unsightly blemishes into perfectly smooth walls. Embrace the process, and enjoy the pride of a job truly well done.